An Introduction to Diffusion Models

扩散模型

什么是扩散模型

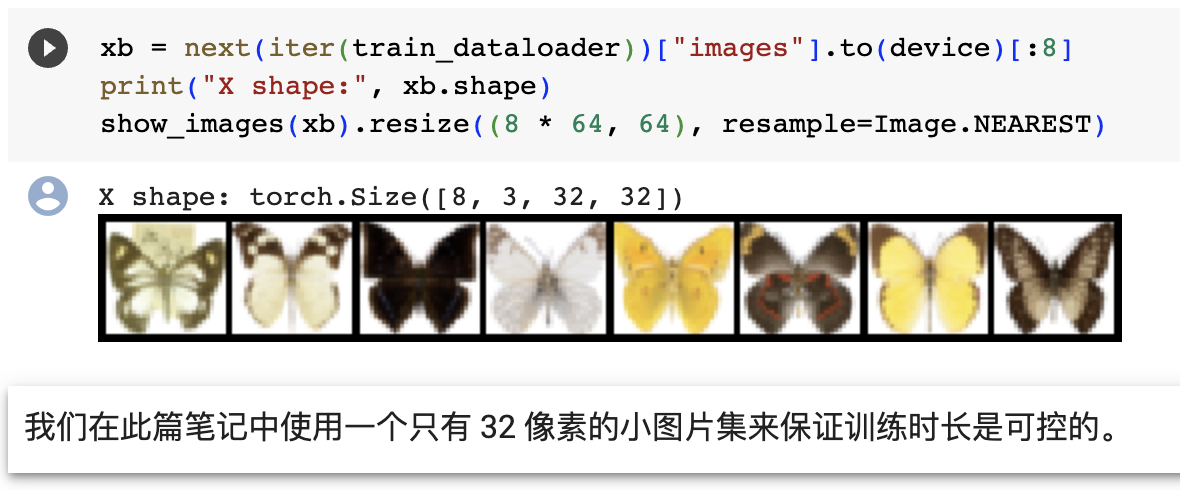
生成模型,从纯噪声开始逐渐去躁数据。

标志

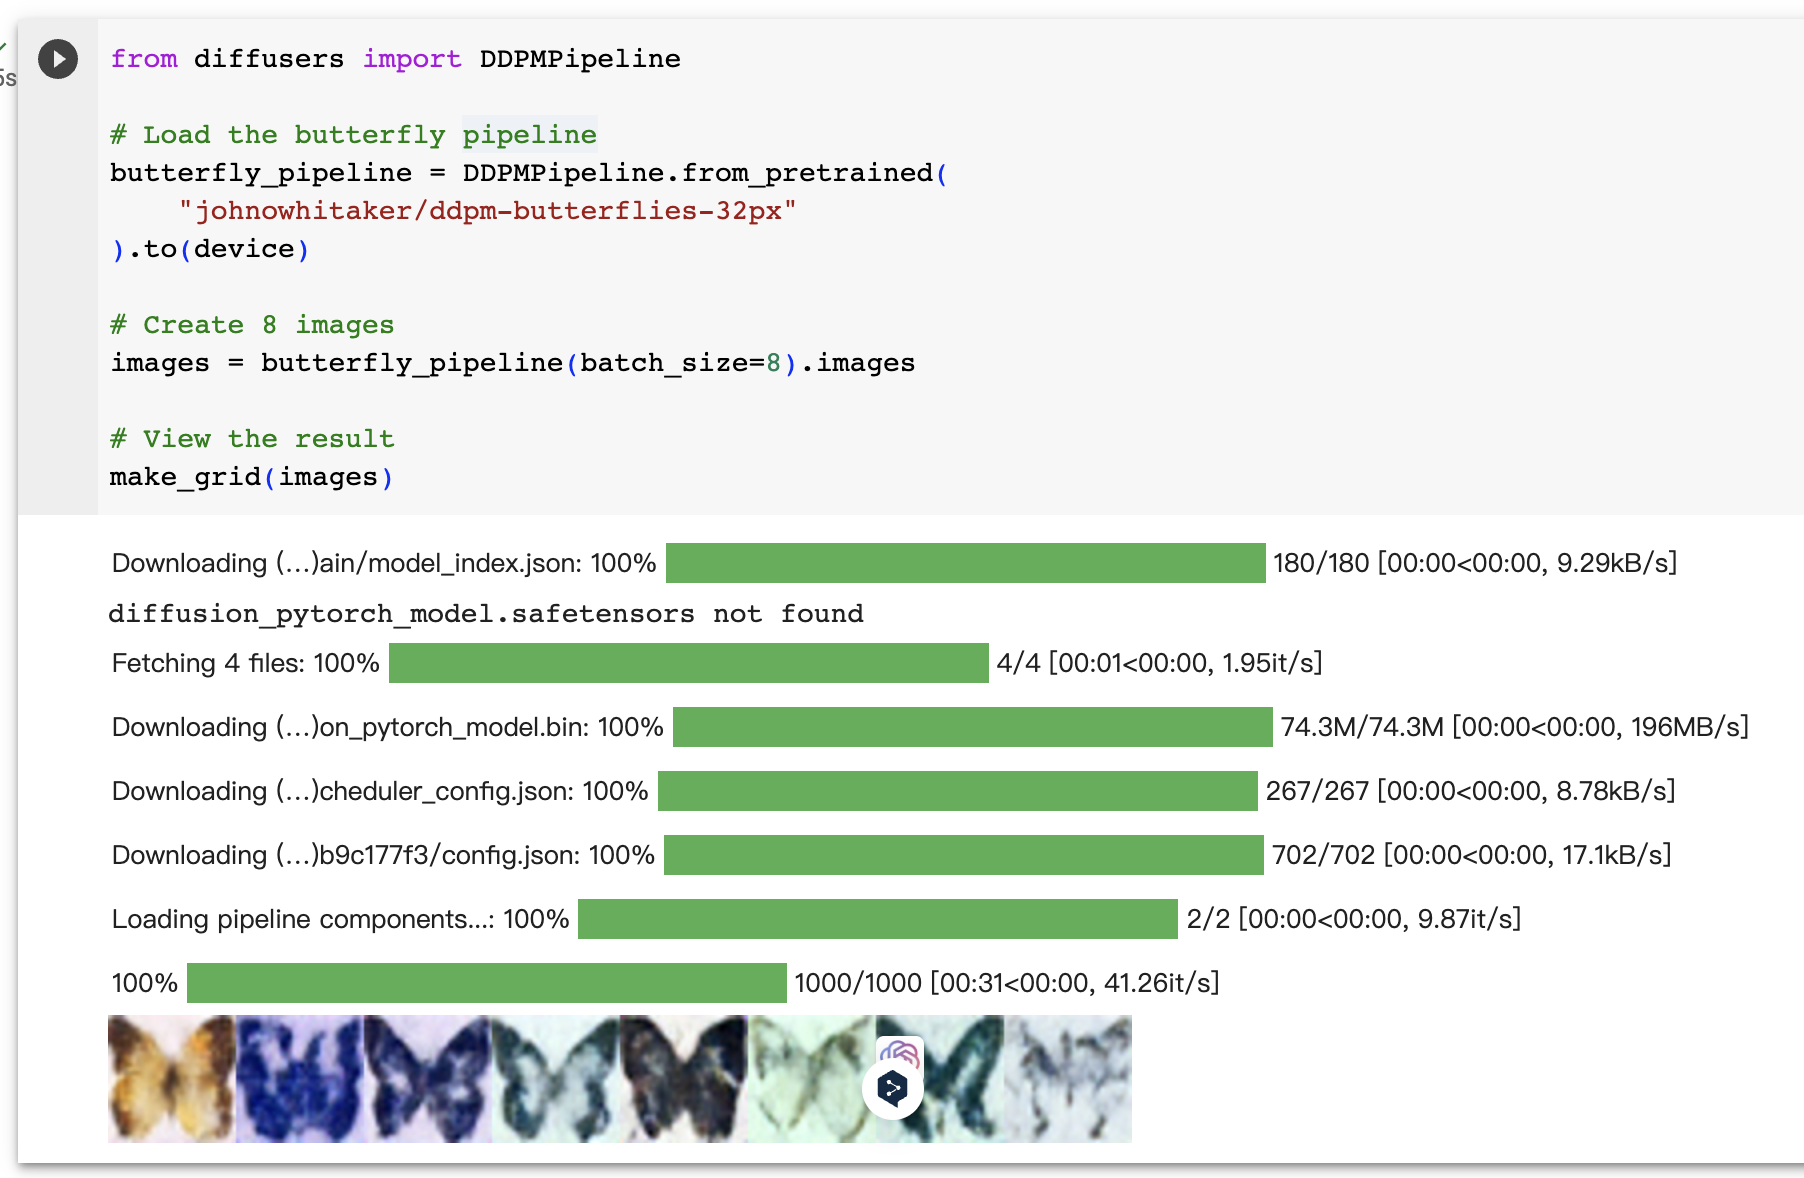
从纯噪音开始进行迭代细化,这种缓慢的渐进去躁是扩散模型的标志,一开始生成的是随机噪声,但经过若干步骤后,噪声会逐渐细化,直到出现输出图像。在每一步中,模型都会估算如何将当前输入图像转化为完全去噪的版本,最终模型输出和当前样本的某种组合

迭代特性

以迭代细化方式训练模型,并通过进行多次预测并每次移动少量来对其进行采样,直到获得类似的去噪输出。

环境准备

1
2
3
4
5
6
7
8
9
10
11
12
13
14
15
!pip install -q -U einops datasets matplotlib tqdm

import math
from inspect import isfunction
from functools import partial

%matplotlib inline
import matplotlib.pyplot as plt
from tqdm.auto import tqdm
from einops import rearrange, reduce
from einops.layers.torch import Rearrange

import torch
from torch import nn, einsum
import torch.nn.functional as F

U-Net模型代码

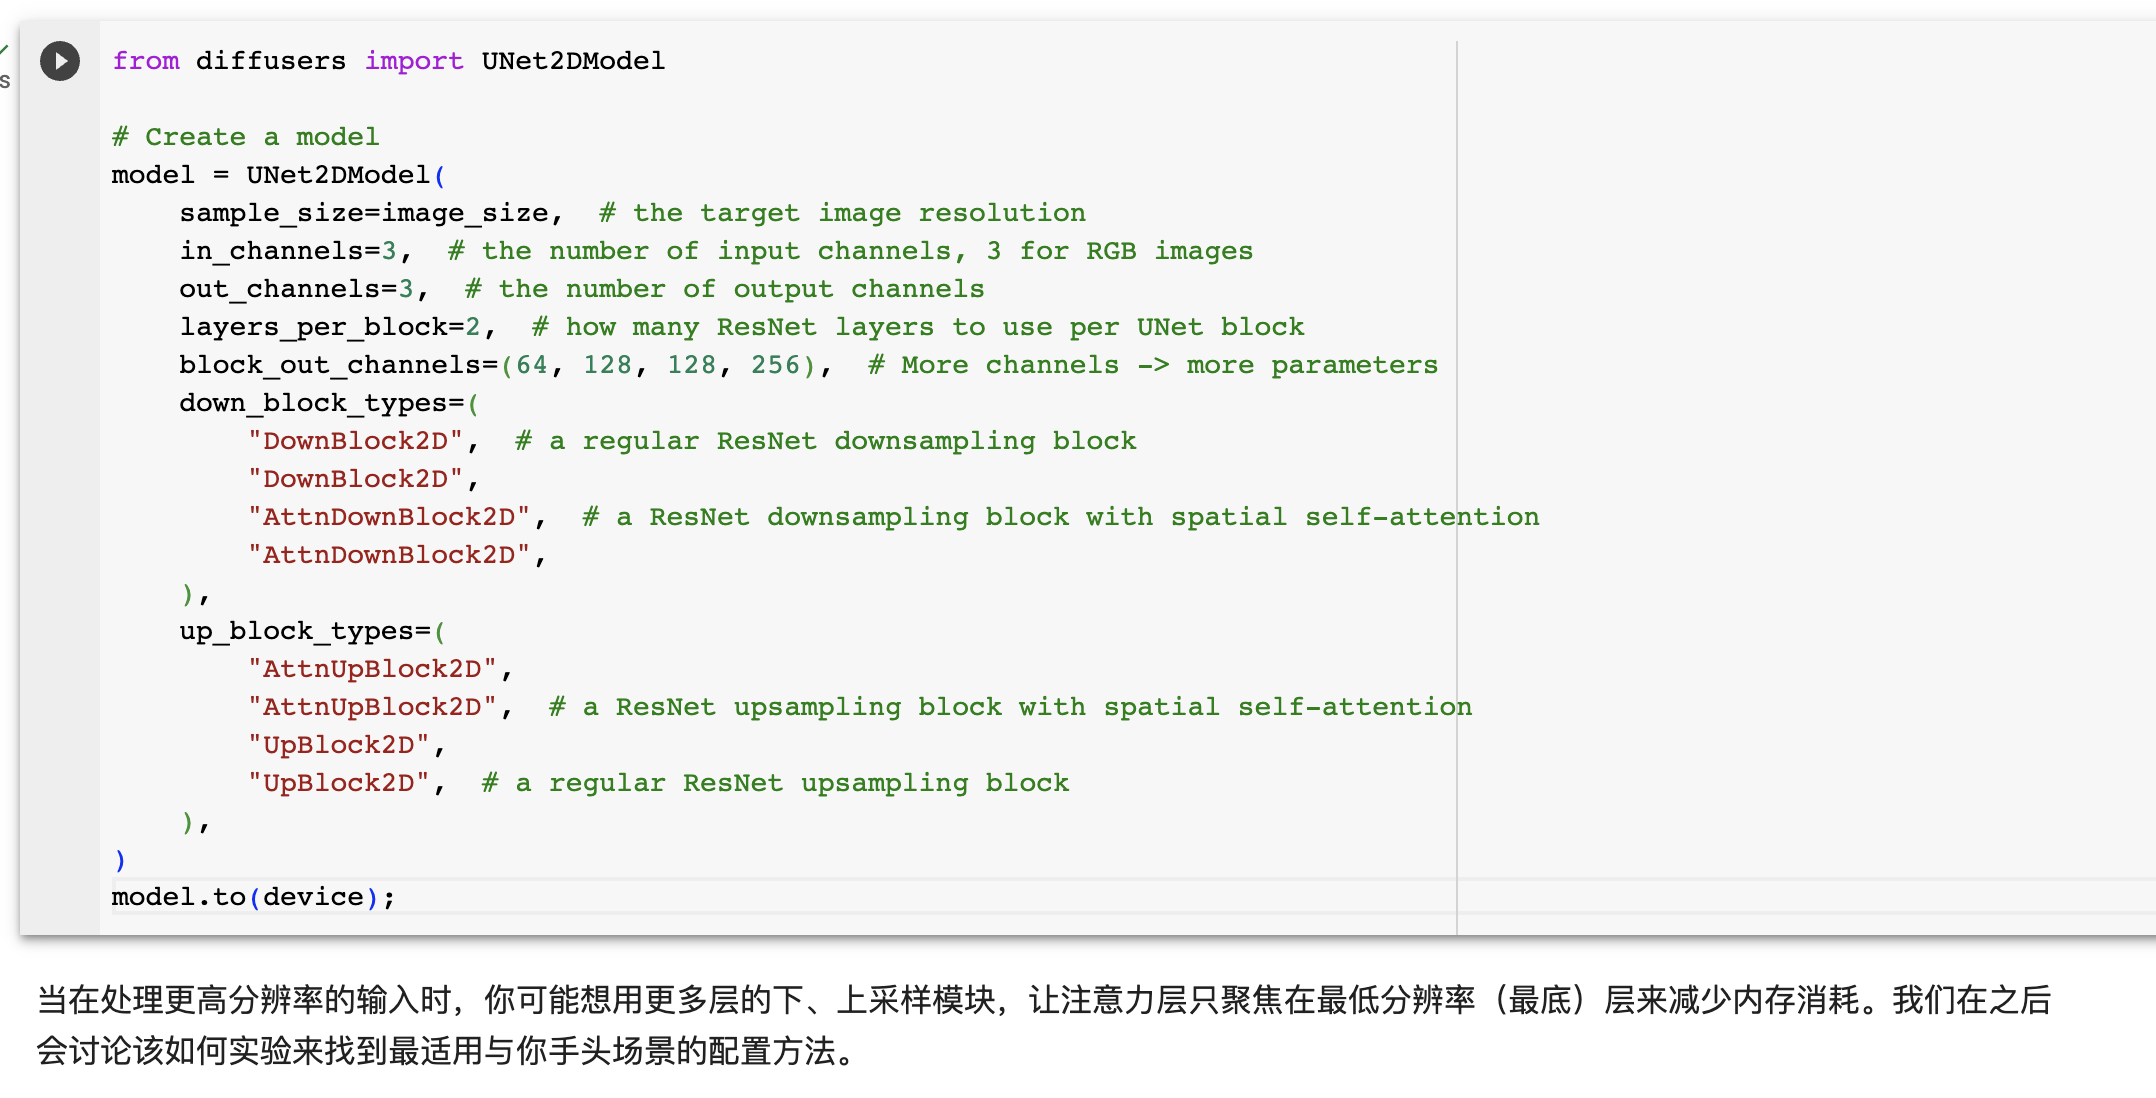
典型的Encoder-Decoder结构,加入了时序建模的时间embedding和条件对比机制。利用ResNet块提取特征,自注意力层进行全局交互,上下采样调整分辨率。

1
2
3
4
5
6
7
8
9
10
11
12
13
14
15
16
17
18
19
20
21
22
23
24
25
26
27
28
29
30
31
32
33
34
35
36
37
38
39
40
41
42
43
44
45
46
47
48
49
50
51
52
53
54
55
56
57
58
59
60
61
62
63
64
65
66
67
68
69
70
71
72
73
74
75
76
77
78
79
80
81
82
83
84
85
86
87
88
89
90
91
92
93
94
95
96
97
98
99
100
101
102
103
104
105
106
107
108
109
110
111
112
113
114
115
116
117
118
119
120
121
122
123
124
125
126
127
128
129
130
131
132
133
134
135
136
class Unet(nn.Module):
def __init__(
self,
dim, # 控制网络整体通道数
init_dim=None, # 第一层卷积层的输出通道数
out_dim=None, # 最后输出通道数
dim_mults=(1, 2, 4, 8), # 每个下采样块中通道数相对上一层的增大倍率
channels=3, # 输入图像的通道数
self_condition=False, # 是否使用条件对比
resnet_block_groups=4, # ResNet块中的group数
):
# 初始化module
super().__init__()

# 定义参数
self.channels = channels
self.self_condition = self_condition
# 输入通道数,包含原图及条件图
input_channels = channels * (2 if self_condition else 1)
# 第一层卷积层输出通道数
init_dim = default(init_dim, dim)

# 第一层卷积,转换通道数
self.init_conv = nn.Conv2d(input_channels, init_dim, 1, padding=0)

# 计算每个下采样层的通道数
dims = [init_dim, *map(lambda m: dim * m, dim_mults)]

# 每个采样层的输入输出通道数
in_out = list(zip(dims[:-1], dims[1:]))

# ResNet块
block_klass = partial(ResnetBlock, groups=resnet_block_groups)

# 时间Embedding层
time_dim = dim * 4
self.time_mlp = nn.Sequential(
SinusoidalPositionEmbeddings(dim),
nn.Linear(dim, time_dim),
nn.GELU(),
nn.Linear(time_dim, time_dim),
)

# 下采样层
self.downs = nn.ModuleList([])
for ind, (dim_in, dim_out) in enumerate(in_out):
is_last = ind >= (num_resolutions - 1)

# ResNet,夜耳注意力层,下采样层
self.downs.append(
nn.ModuleList([
block_klass(dim_in, dim_in, time_emb_dim=time_dim),
Residual(PreNorm(dim_in, LinearAttention(dim_in))),
Downsample(dim_in, dim_out) if not is_last else
nn.Conv2d(dim_in, dim_out, 3, padding=1)
])
)

# 中间层
mid_dim = dims[-1]
self.mid_block1 = block_klass(mid_dim, mid_dim, time_emb_dim=time_dim)
self.mid_attn = Residual(PreNorm(mid_dim, Attention(mid_dim)))
self.mid_block2 = block_klass(mid_dim, mid_dim, time_emb_dim=time_dim)

# 上采样层
for ind, (dim_in, dim_out) in enumerate(reversed(in_out)):
is_last = ind == (len(in_out) - 1)

self.ups.append(
nn.ModuleList([
block_klass(dim_out + dim_in, dim_out, time_emb_dim=time_dim),
Residual(PreNorm(dim_out, LinearAttention(dim_out))),
Upsample(dim_out, dim_in) if not is_last else
nn.Conv2d(dim_out, dim_in, 3, padding=1)
])
)

# 输出通道数
self.out_dim = default(out_dim, channels)

# 最后一个ResNet块
self.final_res_block = block_klass(dim * 2, dim, time_emb_dim=time_dim)

# 输出卷积
self.final_conv = nn.Conv2d(dim, self.out_dim, 1)

def forward(self, x, time, x_self_cond=None):

# 条件输入处理
if self.self_condition:
x_self_cond = default(x_self_cond, lambda: torch.zeros_like(x))
x = torch.cat((x_self_cond, x), dim=1)

# 初始化卷积
x = self.init_conv(x)

# 保存输入,用于最后注意力
r = x.clone()

# 时间Embedding
t = self.time_mlp(time)

# 存储采样特征
h = []

# 下采样
for block1, block2, attn, downsample in self.downs:
x = block1(x, t)
h.append(x)
x = block2(x, t)
x = attn(x)
h.append(x)
x = downsample(x)

# 中间层
x = self.mid_block1(x, t)
x = self.mid_attn(x)
x = self.mid_block2(x, t)

# 上采样
for block1, block2, attn, upsample in self.ups:
x = torch.cat((x, h.pop()), dim=1)
x = block1(x, t)
x = torch.cat((x, h.pop()), dim=1)
x = block2(x, t)
x = attn(x)
x = upsample(x)

# 和输入特征拼接
x = torch.cat((x, r), dim=1)
x = self.final_res_block(x, t)

# 输出卷积
return self.final_conv(x)

定义模型 GPU计算

1
2
3
4
5
6
7
8
9
10
11
12
13
14
15
16
17
18
19
20
21
22
23
24
25
26
27
28
29
30
31
32
33
34
35
36
37
38
39
40
41
42
43
from torch.optim import Adam

device = "cuda" if torch.cuda.is_available() else "cpu"

model = Unet(
dim=image_size,
channels=channels,
dim_mults=(1, 2, 4,)
)
model.to(device)

optimizer = Adam(model.parameters(), lr=1e-3)

from torchvision.utils import save_image

epochs = 6

for epoch in range(epochs):
for step, batch in enumerate(dataloader):
optimizer.zero_grad()

batch_size = batch["pixel_values"].shape[0]
batch = batch["pixel_values"].to(device)

# Algorithm 1 line 3: sample t uniformally for every example in the batch
t = torch.randint(0, timesteps, (batch_size,), device=device).long()

loss = p_losses(model, batch, t, loss_type="huber")

if step % 100 == 0:
print("Loss:", loss.item())

loss.backward()
optimizer.step()

# save generated images
if step != 0 and step % save_and_sample_every == 0:
milestone = step // save_and_sample_every
batches = num_to_groups(4, batch_size)
all_images_list = list(map(lambda n: sample(model, batch_size=n, channels=channels), batches))
all_images = torch.cat(all_images_list, dim=0)
all_images = (all_images + 1) * 0.5
save_image(all_images, str(results_folder / f'sample-{milestone}.png'), nrow = 6)

输入模型中的图片经过几个由 ResNetLayer 构成的层,其中每层都使图片尺寸减半。之后在经过同样数量的层把图片升采样。其中还有对特征在相同位置的上、下采样层残差连接模块。模型一个关键特征既是,输出图片尺寸与输入图片相同.

生成的图像结果代码处理逻辑学习理解

1
2
3
4
5
6
7
8
9
10
11
12
13
14
15
16
17
18
19
20
21
22
23
import numpy as np
import torch
import torch.nn.functional as F
from matplotlib import pyplot as plt
from PIL import Image

def show_images(x):
"""Given a batch of images x, make a grid and convert to PIL"""
x = x * 0.5 + 0.5 # Map from (-1, 1) back to (0, 1) # 将图像的值从(-1, 1)映射回(0, 1)的范围内
grid = torchvision.utils.make_grid(x) # 使用torchvision.utils.make_grid将批量图像拼成网格
grid_im = grid.detach().cpu().permute(1, 2, 0).clip(0, 1) * 255 # 将tensor转换为CPU上的numpy数组,并转换为PIL Image格式
grid_im = Image.fromarray(np.array(grid_im).astype(np.uint8)) #
return grid_im


def make_grid(images, size=64): # 将一组PIL Image拼接成一行,将tensor表示的批量图像拼接成网格。这个函数通常用来显示训练过程中生成的图像结果。
"""Given a list of PIL images, stack them together into a line for easy viewing"""
output_im = Image.new("RGB", (size * len(images), size))
for i, im in enumerate(images):
output_im.paste(im.resize((size, size)), (i * size, 0))
return output_im
# Mac users may need device = 'mps' (untested)
device = torch.device("cuda" if torch.cuda.is_available() else "cpu")

相关参数

在使用Diffusion生成图片时调整参数以获取更好效果,可以从以下几个方面调整:

  1. num_inference_steps: 推理步数,值越大生成的图片质量越高,但速度越慢。一般50-100是一个合理的范围。

  2. guidance_scale: 指导尺度,控制文本prompt的作用力。值越大对prompt越忠实。7-15是一个合适的范围。

  3. cfg_scale: CLIP模型作用力,可以增强生成图片的逼真度和识别能力。默认值是7,可以尝试增加到10左右。

  4. Height/Width: 生成图片分辨率,越大则细节越丰富,但消耗越大。

  5. Batch size: 一次生成的图片数量,对显卡影响很大,根据环境调整。

优化模型超参数

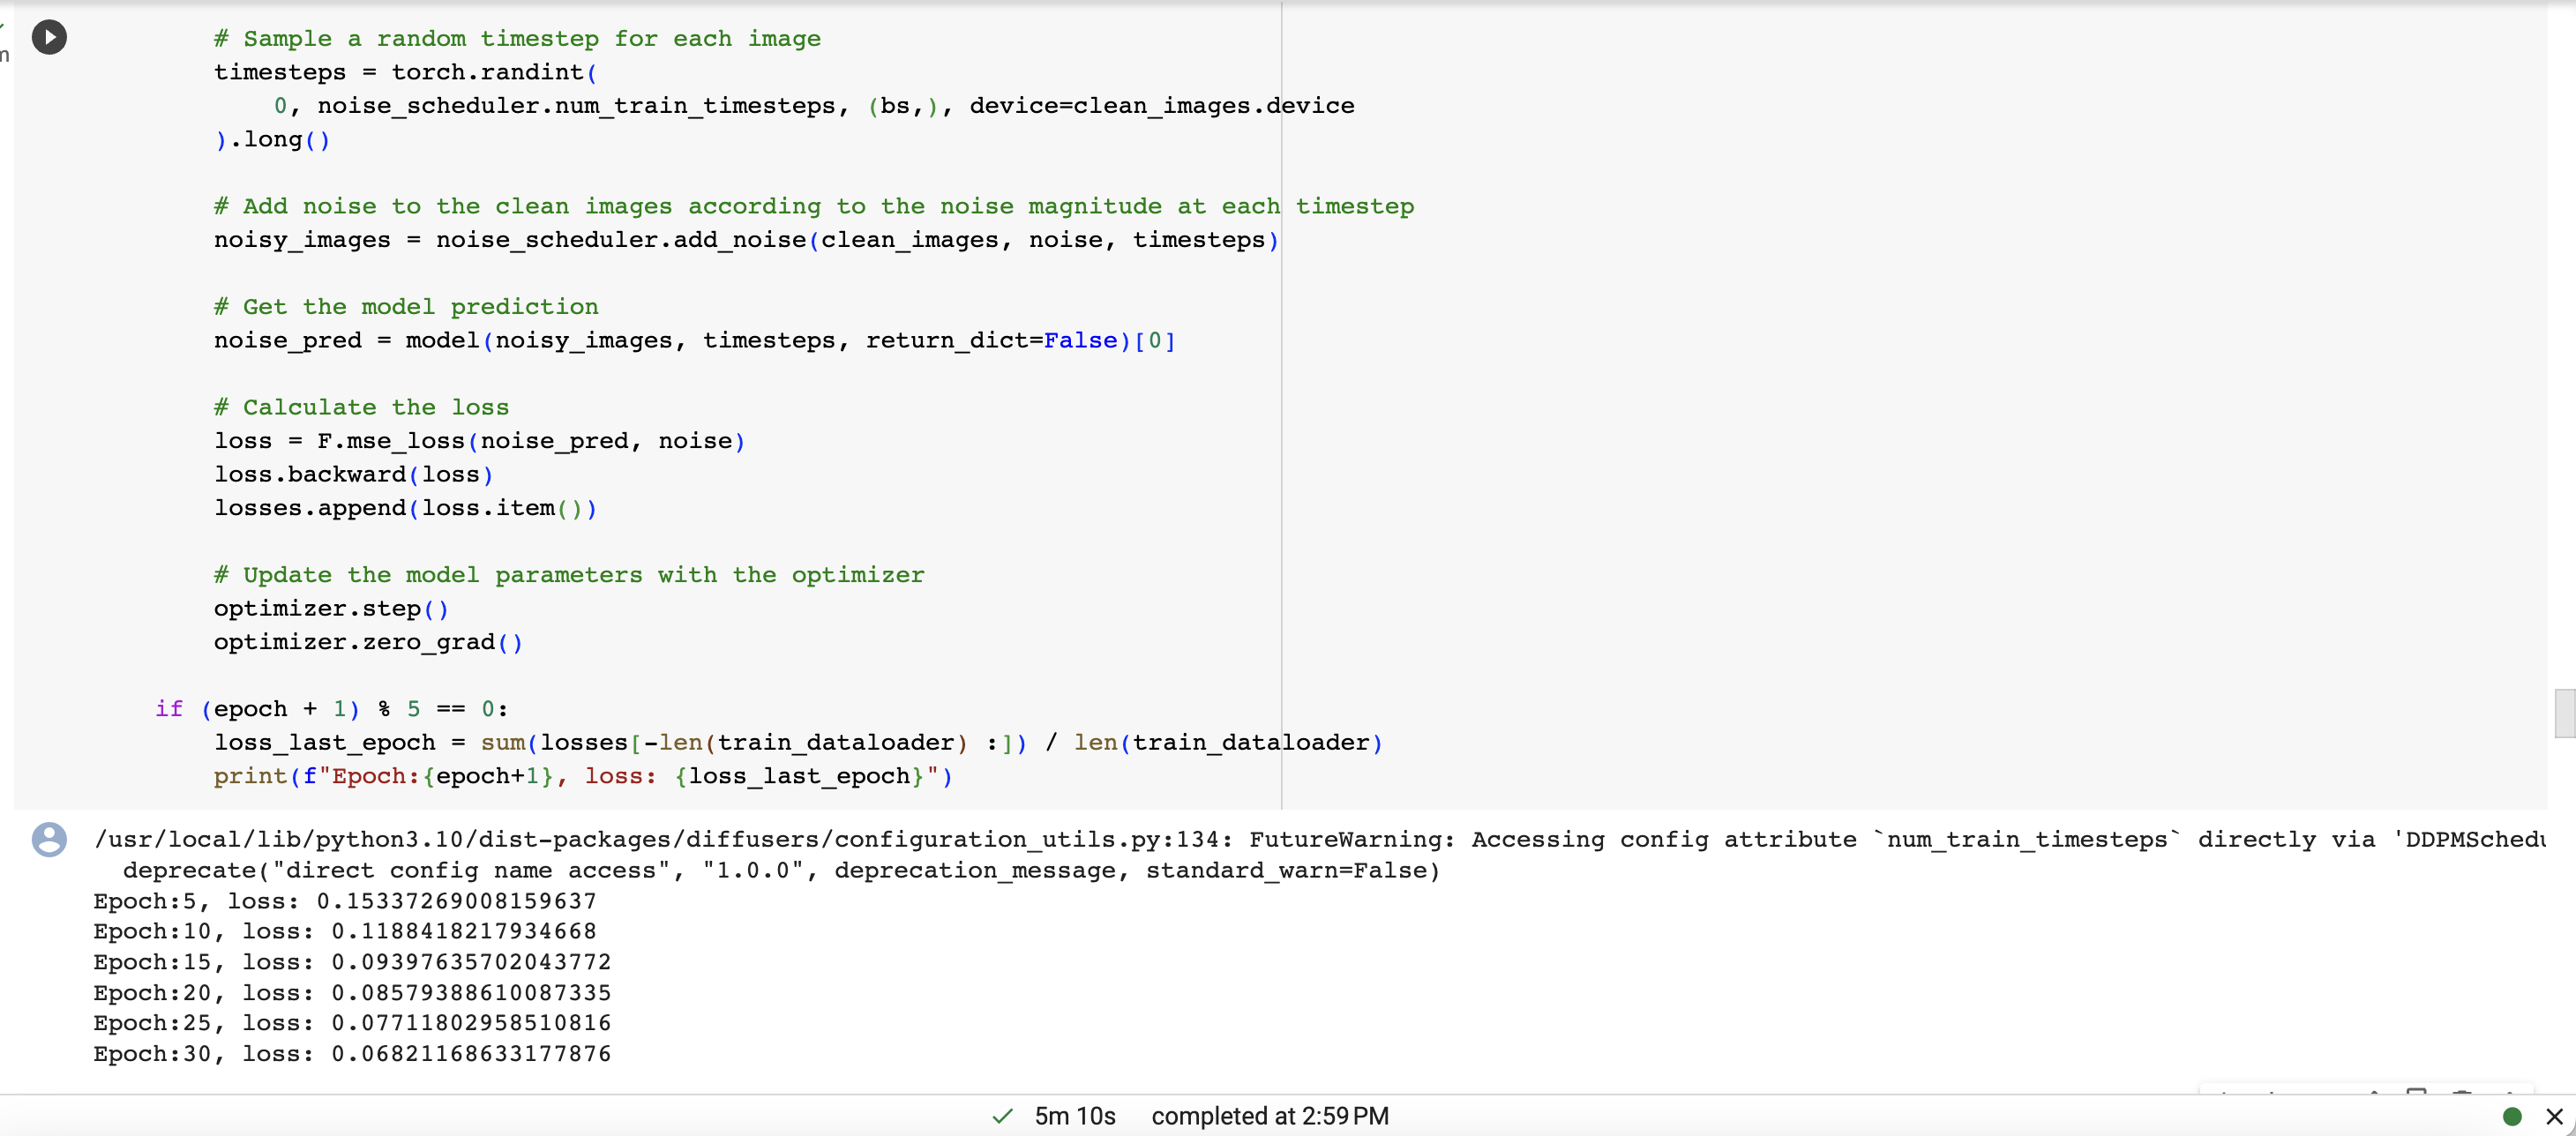
计算FID是评估生成图片质量的常用定量指标,可以用来优化模型超参数。
通过以下方式计算生成图片的FID(Frechet Inception Distance)分数:

  1. 导入必要的包:
1
2
from diffusers import FID
from PIL import Image
  1. 加载预训练好的Inception v3模型来进行特征提取:
1
model = FID.load_inception_v3()
  1. 将生成的图片读取为PIL Image对象,构建一个images列表
1
2
3
4
images = []
for i in range(num_images):
img = Image.open(f"generated_{i}.png")
images.append(img)
  1. 计算images与真实图片集的FID score:
real_imgs = load_real_images() # 载入真实图片
fid = FID.calculate_fid(model, real_imgs, images)

较低的fid分数表示生成图片的分布更接近真实图片集。
或者直接使用diffusers库中的FIDScore评估器类进行计算。

Diffusers 的核心 API 三个主要部分:

  • 管道: 从高层出发设计的多种类函数,旨在以易部署的方式,能够做到快速通过主流预训练好的扩散模型来生成样本。
  • 模型: 训练新的扩散模型时用到的主流网络架构,e.g. UNet.
  • 管理器 (or 调度器): 在 推理 中使用多种不同的技巧来从噪声中生成图像,同时也可以生成在 训练 中所需的带噪图像。
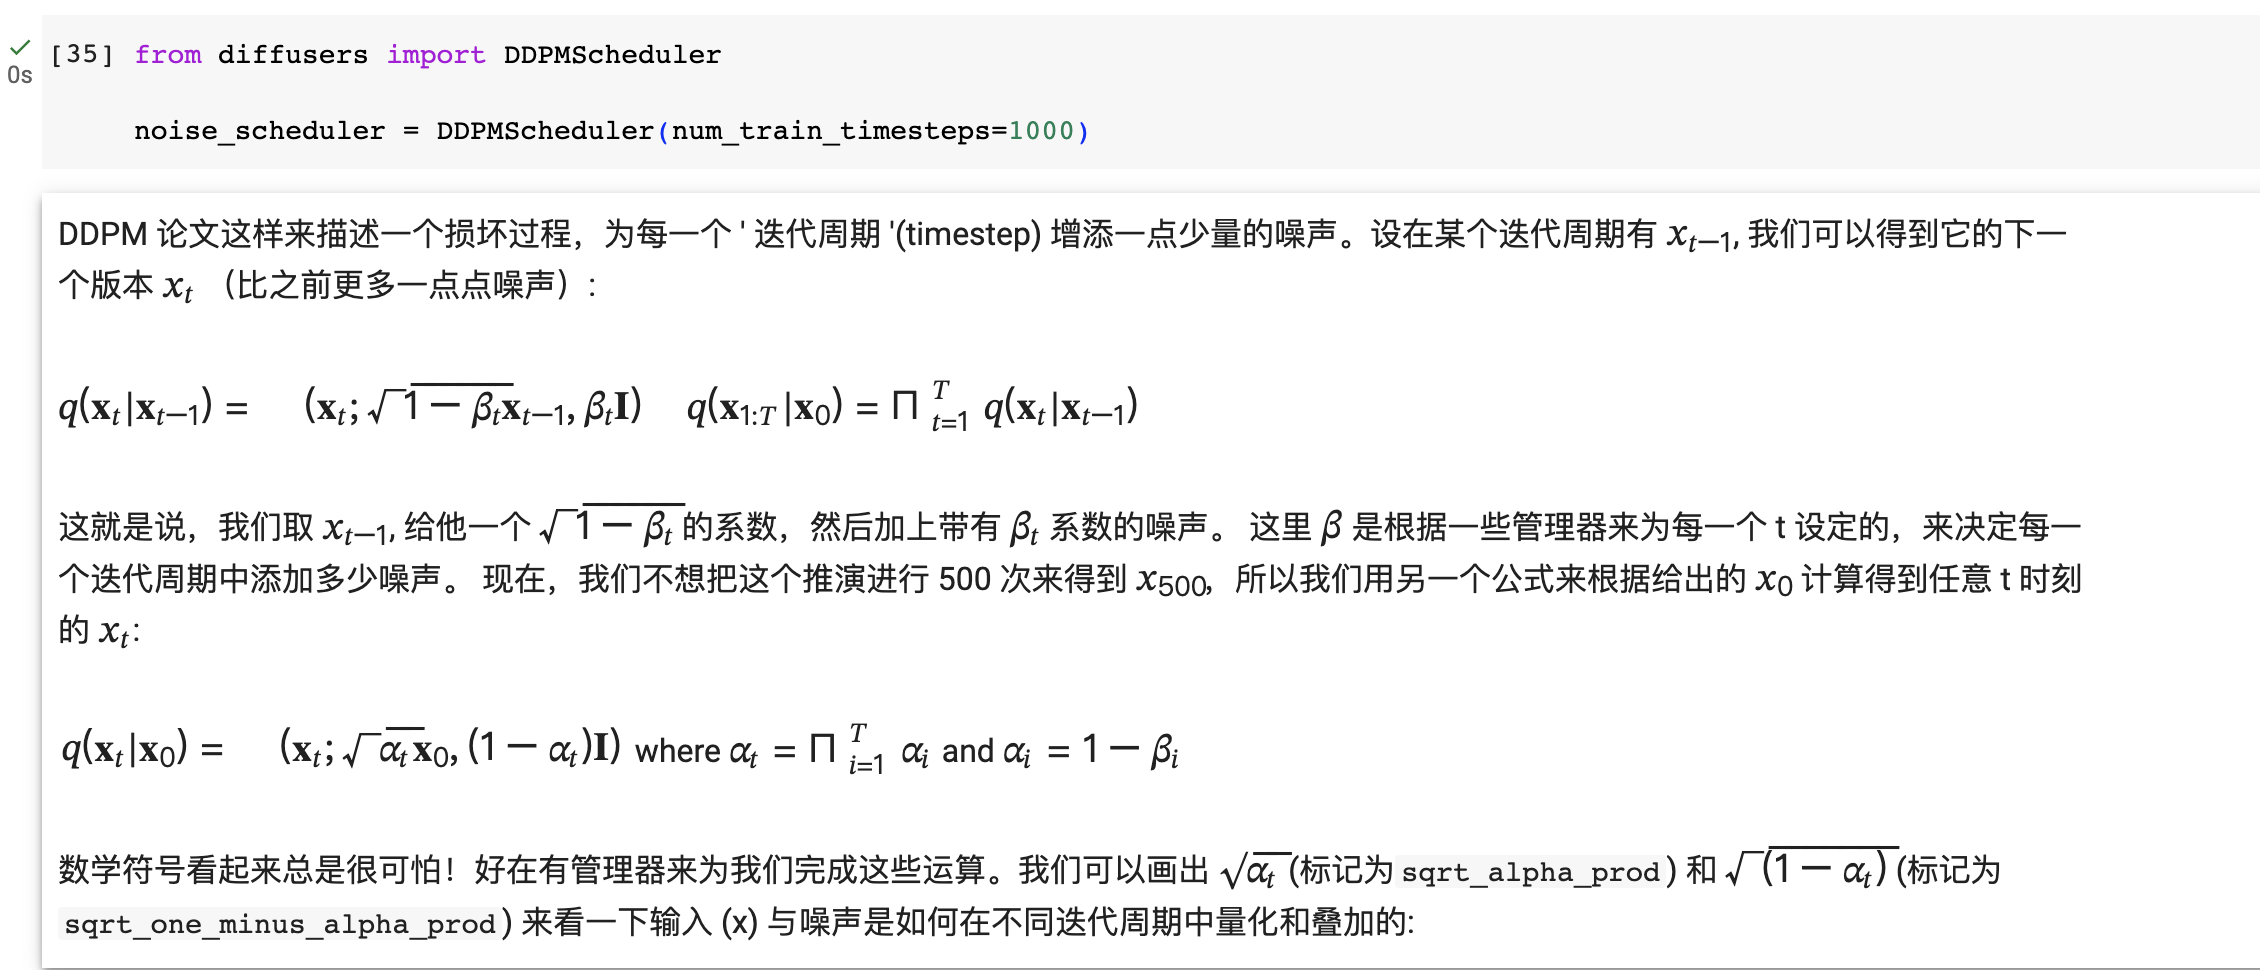
image-5.png
image-6.png

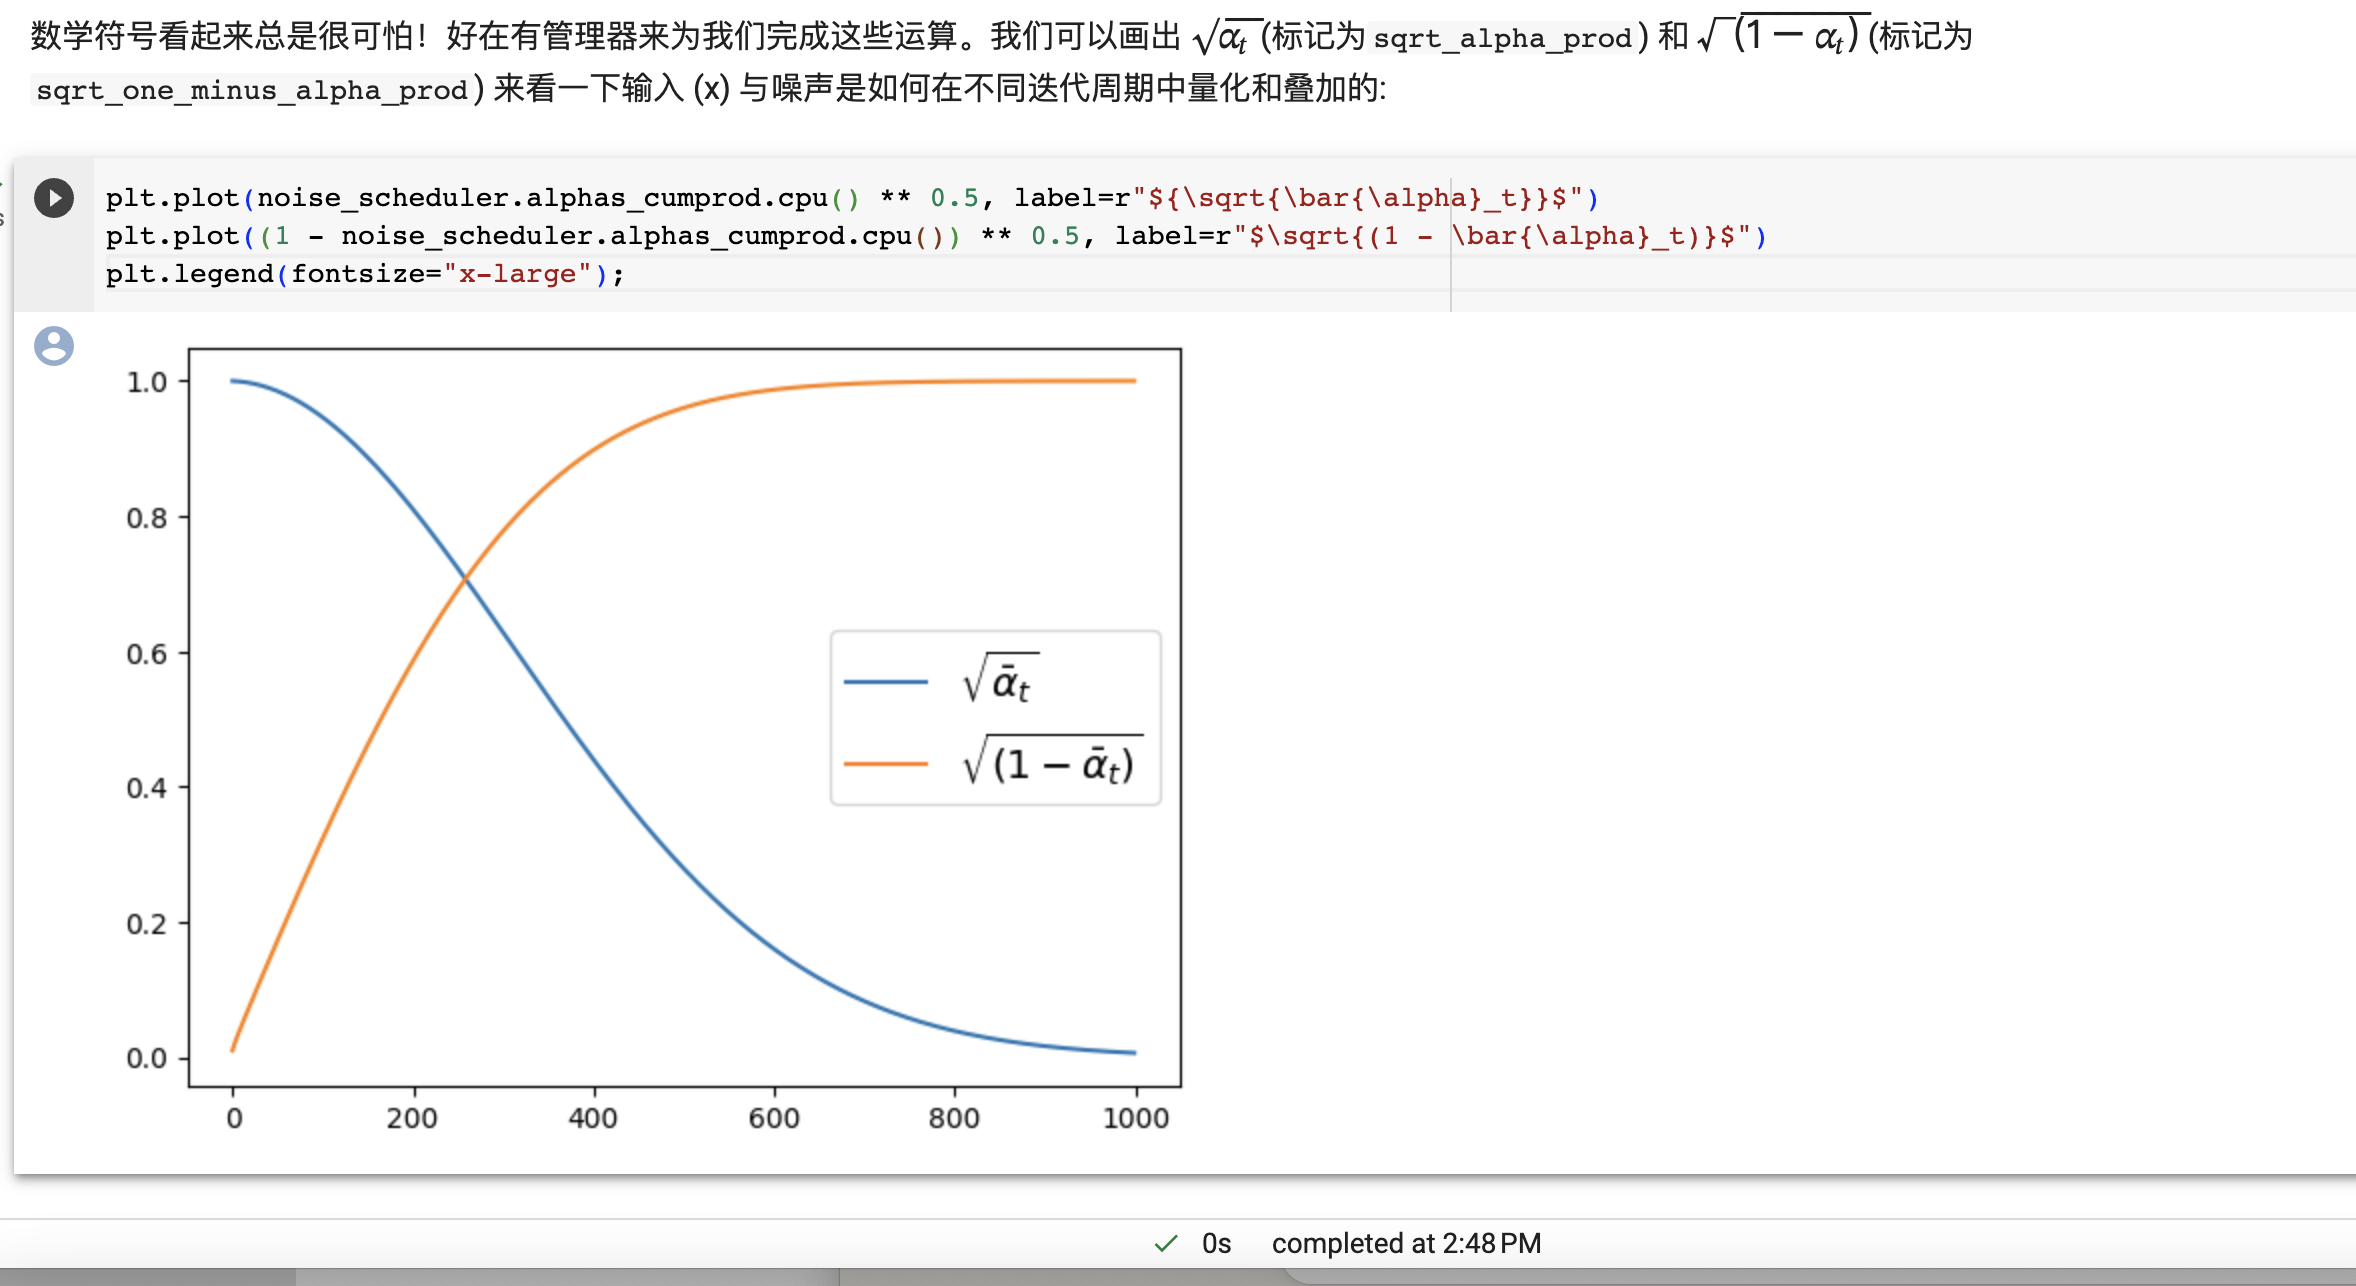
beta_start和beta_end控制的是加噪过程的开始和结束的噪声水平。

  • beta_start: 开始训练时添加的噪声量,值越小表示开始时添加的噪声越少。默认是0.0001。
  • beta_end: 训练结束时添加的噪声量。默认是0.02。
    它们的曲线意义如下:
  • sqrt(bar{alpha}_t):表示随训练步长增加,去噪的程度,曲线越陡峭表示去噪越快。
  • sqrt(1 - bar{alpha}_t):表示残余的噪声量,曲线越低表示最后的噪声越少。
    如果beta_start设置得太大,去噪会从一开始就很快,对训练不利;如果beta_end太小,说明最后噪声去除不充分,质量下降。
    beta_schedule设置噪声曲线的形状,cosine形状的去噪速度更好更稳定。
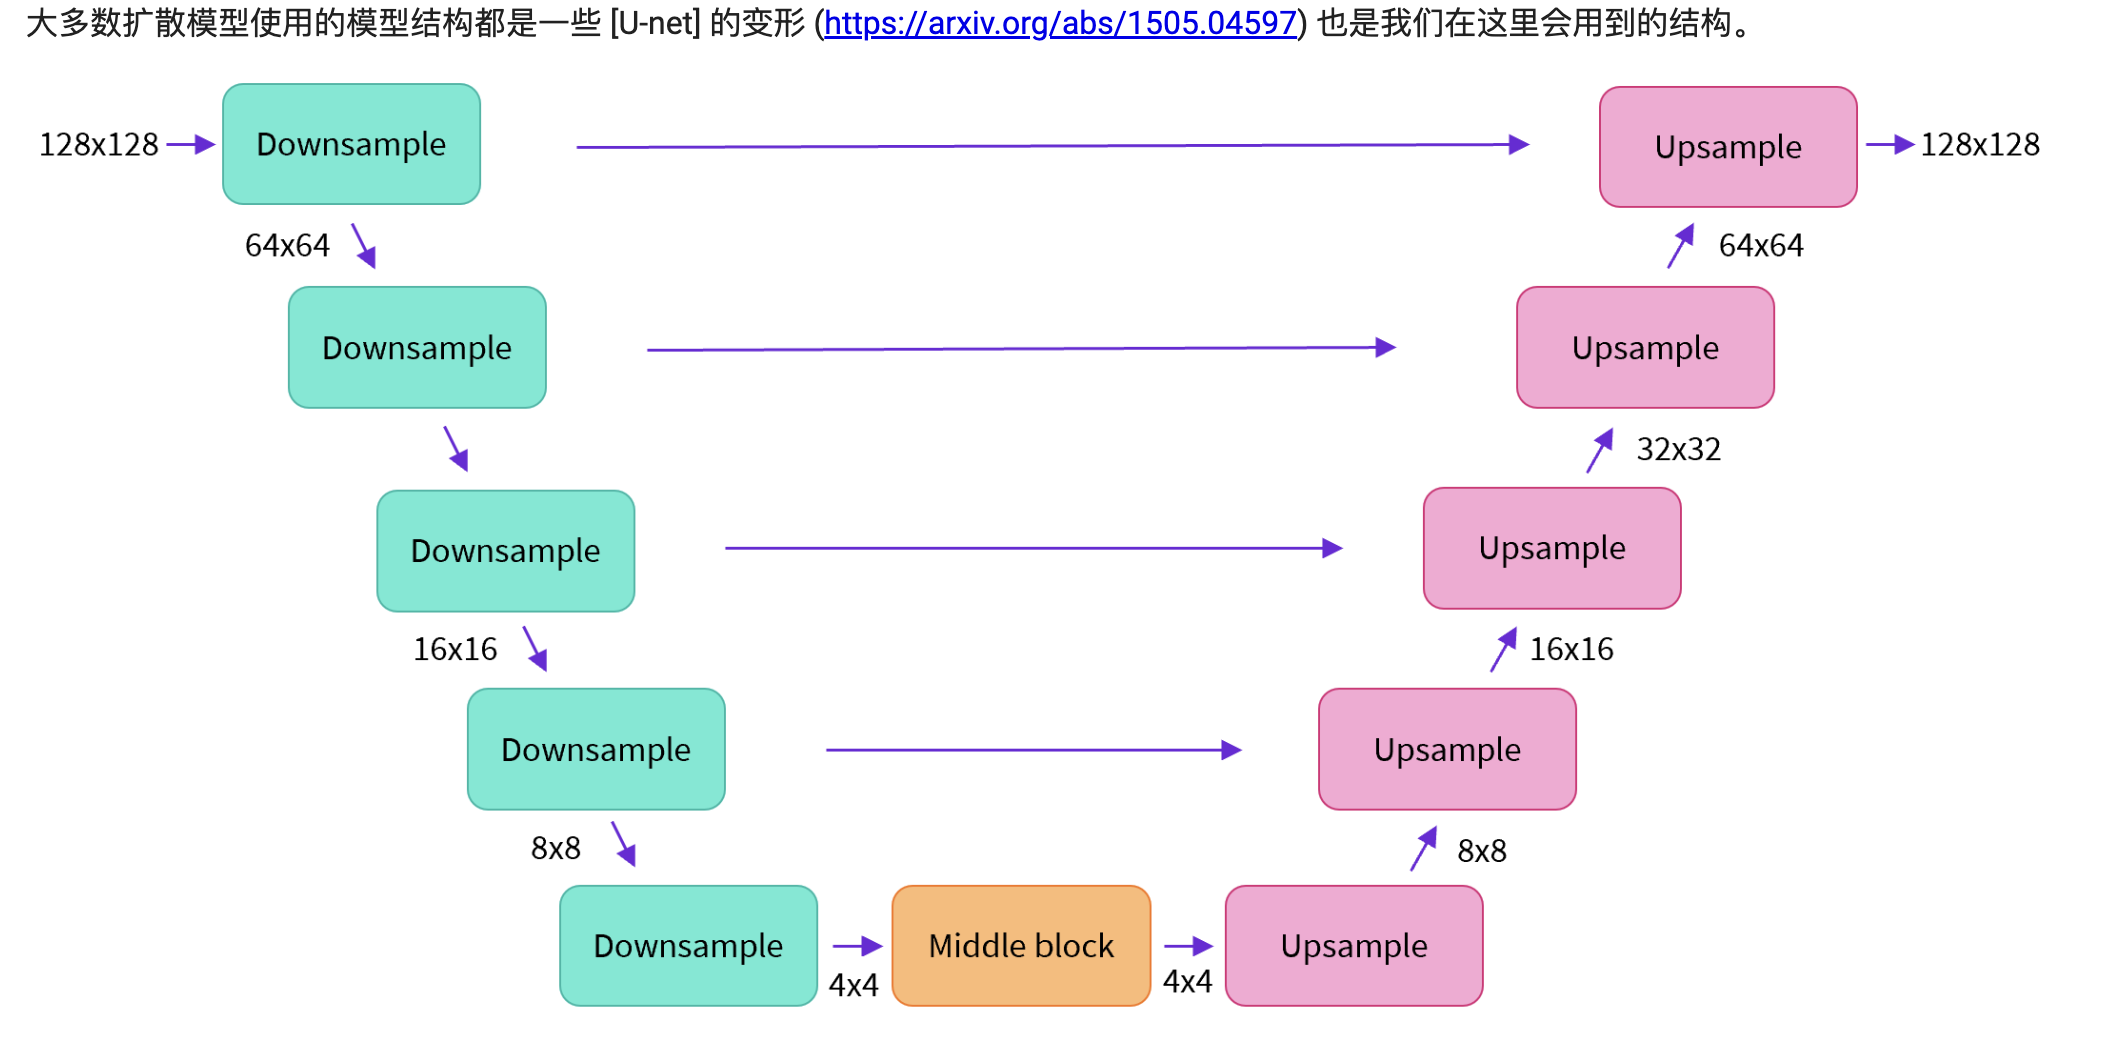
image-7.png
image-8.png
image-9.png

image-1.png
image-4.png
image-5.png
image-3.png
image-2.png
image.png


An Introduction to Diffusion Models
https://www.prime.org.cn/2024/02/15/An-Introduction-to-Diffusion-Models/
Author
emroy
Posted on
February 15, 2024
Licensed under